Singing the praises of the sewing machine

April 01, 2009

Probably the most persistent pregnancy symptom that I've noticed is near-constant hip and lower back soreness. I've been stiffer than normal for months now, and sitting in most chairs is difficult after about fifteen minutes. On the whole I've adjusted, but after the afternoon of gardening on Sunday I was too sore to find a good spot.

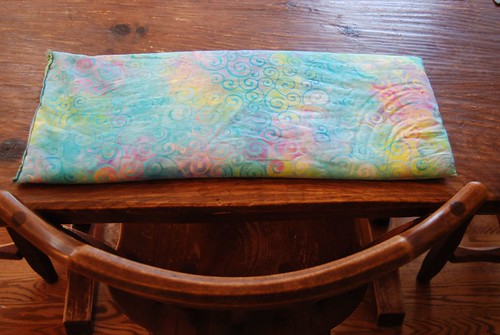
I thought of the microwavable heating pads I've seen online. This turned out to be one of the highest payoff craft projects ever. The entire thing took seven minutes to make, and that included scrounging in the kitchen for a good filler (we didn't have enough lentils, so I used white rice), choosing pretty fabric and thread, and both ironing and pinning the fabric before sewing. I used a fat quarter (folded in half, it wraps around the base of my back perfectly) about a pound of white rice, and a lavender sachet (I bought mosaic mirrors from Etsy as a bridesmaid gift, and the woman who made them included a few sachets of the lavender she grows. I love Etsy.) I double-rolled the edges before seaming to make them sturdier. It gets nice and warm after about 3 minutes in our ancient microwave, and the heat lasts for a good half hour. Blissful. :-)

Labels:

Kevin's curtains

September 21, 2008

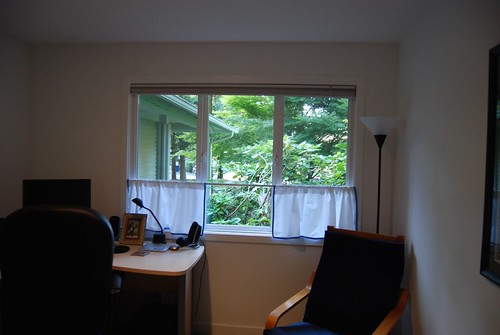
I was so flattered when Kevin said that he wanted curtians like I'd made for my office, just "not with the lace." Yay! Totally!

We went to Joanns so that Kevin could choose a color, and bought plain white cotton and blue ribbon for the edges. Turns out that ribbon was completely the wrong thing (too stiff, yet won't hold a pressed edge). Oops.

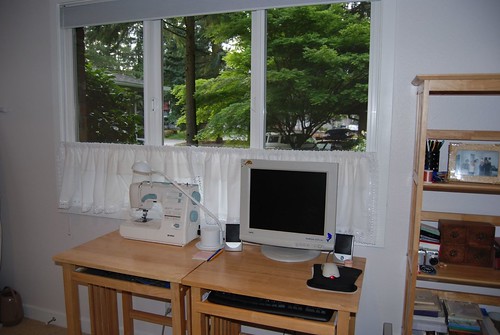
I found bias tape in almost the same color as Kevin's ribbon choice at $1.99 for 3 yards and decided to spring for two packages. The ribbon can now get relegated to gift-wrapping. A success!! Here they are open to the view of the rhodedendron and all of the little birds:


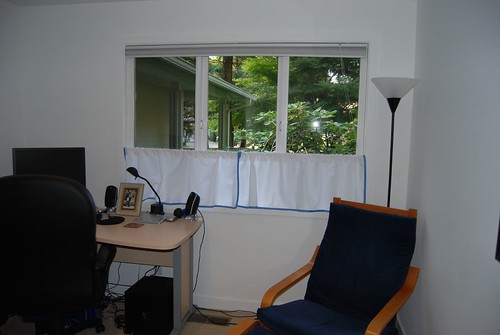
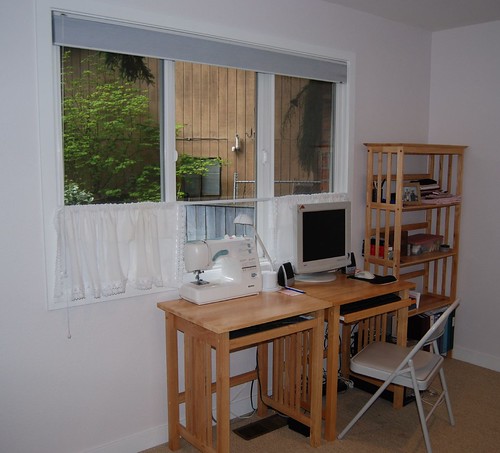
And closed for privacy:


Not bad for essentially a 25 minute, $12 project. :-)

Labels:

A chess bag for my brother

September 17, 2008

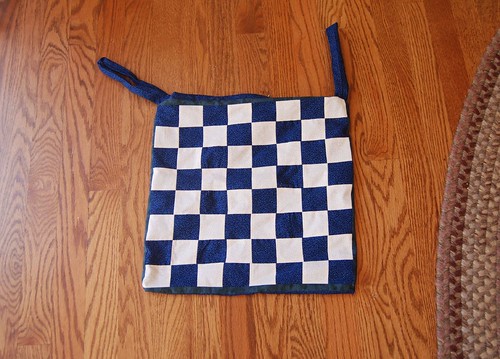
My brother lives in NYC, and he and his roommate occasionally take a chess set down to the local bar and play. Aside from thinking they were cool to do that, this news made me think many things – that game boxes are hard to carry, that spilled beer would warp one of those cardboard game boards, and that I'd been seeing lots of "checkerboard" sort of quilting patterns recently. So I took some of the remnant cotton print fabric from the Olympic Mountains quilt, and made him a chess bag.


It's machine washable and dryable. It has a zipper and a lined pouch to hold all of the pieces.


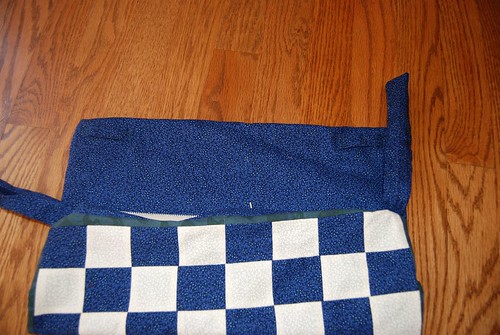
And there are two handles, which can slide into fabric slots to fold the bag in half and make it smaller/easier to carry.


I'm pretty pleased with the way it turned out. The bag, lying flat, is about 14½" square. Dave got it last week, and actually seemed quite pleased about this little bit of unsolicited crafting. And at least even if it only gets used occasionally, it's tiny to store. :-)

Mostly for my reference, since I'm sure I'll find occasion to make this again:

To make a zippered chess bag:
Materials:

  • 9" x 18" light fabric for the light checks
  • 9" x 18" dark fabric for the dark checks
  • 4 1"x15" strips accent fabric
  • 15"x15" fabric for the back
  • 15" by 28" fabric for the lining
  • Zipper (12" or cut to 12")
  • Bias tape or 2" strips ironed in half for handles.

Steps:

  1. Take your light and dark check panels. Cut 4 strips in each color: 2¼ x18.
  2. Sew together alternating strips to form a striped rectangle (14¼x18”) . Press. (Note that all seams were ¼".)
  3. Turn the rectangle and cut 7 times against the stripes to make 8 multicolor strips that are 2 ¼” wide.
  4. Lay these strips in an alternating fashion to for a checkerboard.
  5. Sew strips together. Press.
  6. Add a border of accent fabric. Press. The top is now complete.
  7. Place the checkerboard top and the plain back right sides together. Fold the lining around them, right side facing out, and seam along the lining fold. You now have a clean seam along the bottom of the bag. The whole ensemble looks kind of like a book with a cover and two pages.
  8. On the edge opposite the seam, sew the zipper. Turn each half inside-out to sew. Use pins. I added a strip of fabric with each seam, pressed lengthwise, to hide the zipper when it's closed.
  9. Turn the bag right side out again and zip the zipper closed. Fashion two tubes of fabric (mine were 2" wide and 10" long before seaming) for handles. Slip them into place at each end of the zipper, and sew them into place as you close any gaps between the zipper and the sides of the bag.
  10. Make two more little tubes (the length of your handle width plus ¼") and sew the two ends to the edges of the back of the bag, near the seam opposite the zipper. The handles will slip through these to fold the bag in half for carrying.
  11. Now you have two ends of the bag closed. To closed the sides, you can open the zipper, turn the bag inside out, and sew all four layers of fabric together on both sides. This is easiest, but you have a ragged edge on the bag inside. Add bias tape (or just fabric tape, it doesn't need to be bias for such a short, straight seam) to finish the edge if it bothers you.

Labels:

Curtains

May 15, 2008

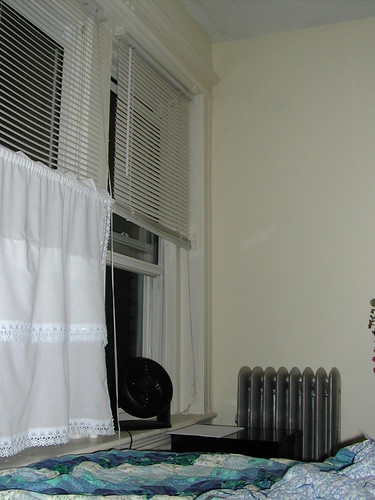
I've been meaning to figure out curtains for my office. My desk is set up right in front of the window, which is generally lovely, but on dark days and at twilight it seems to lack privacy. I had a bunch of white cotton and lace curtains that I bought at my church's annual rummage sale for my Boston apartment. I just went on a massively nostalgic photo tour to find shots of those curtains in action, and here they were in my Boston Bedroom, circa June '04.


(All I can think of is the T, the Red Sox on TV and the game day crowds, Kevin's thesis, tulips bought on the way home, carrying groceries up three flights, and the way that the air smelled after dinner while everything cooled off.)

For Boston, I'd sewn sets of curtains together so that they would be longer. For this house, I pulled out those seams and sewed a channel for the curtain rod at about 2/3 the height. I found a spring-loaded curtain rod at Ace Hardware for about $4. Now, I can sit behind them and see the trees and sky, but anyone in the road or the neighbours can only see the top of my head. Perfect.


Or, during the day, I can slide them open and watch all the goings-on in the front yard.


I'm all pleased. :-)

Labels: ,

More closet voyeurism

March 13, 2008

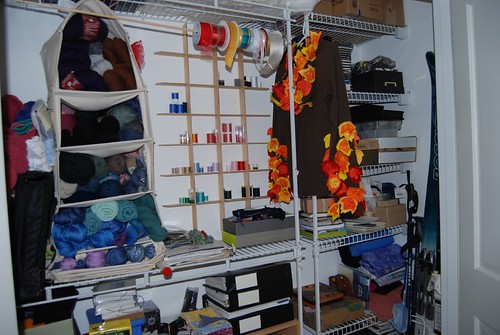
One of the shelves from our closet had this little waffle insert thing. I’m not sure what it’s intended use was (tie storage? Socks?), but I didn’t just want to toss it. I mulled it over while I was unscrewing and rescrewing the doors, the bars and the sliding tracks, and then inspiration hit.


It’s a three bedroom house, which means that for the time being Kevin and I each have our own room, and our own double closet. His is filled with old electronics equipment and mine is filled with yarn and fabric, and now thread. :-) I’ve been still trying to keep all of my thread in my old sewing kit, but it’s been getting more and more crowded in there. I was sort of amused when storing it away to realize that 18 of those spools are from 1990 or earlier, and 19 are from the last three years... apparently middle school, high school and college were NOT the thread-buying years.

PS. I can’t tell you how happy the closet keeps making me. Wide open spaces!!

Labels: ,

Something to fill the hours

May 21, 2007

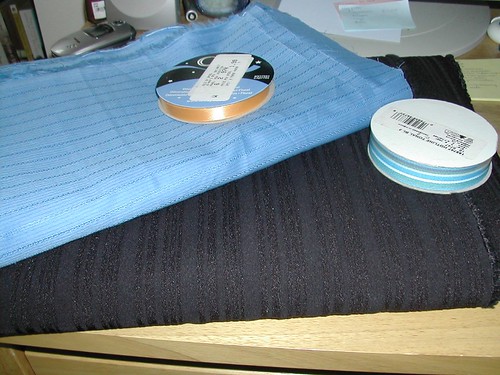
Last night, despite the fact that I probably need another project like I need a hole in the head, I finally decided to do something with this pile of fabric:


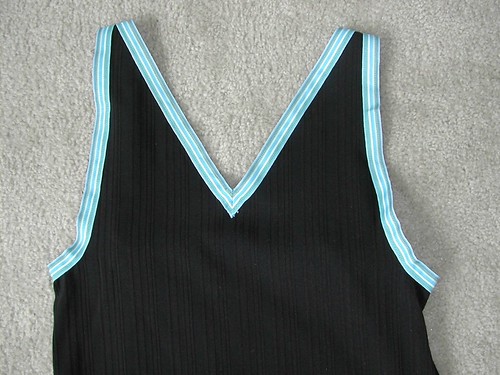
That's black knit suiting with vertical stripes, and blue cotton with vertical lines of lace, plus contrasting ribbon for each. I've been shopping endlessly recently. Between David's graduation, a party for my high school swim coach who's retiring, the rehearsal, and the evening before, I need several dresses, shoes, and wraps, since Boston in May/June will either be 90 degrees or 40. Then, we leave for a week in Hawaii, and I need honeymoon-worthy beach clothes. Since Seattle is neither a dressy town, nor a sunny one, this has meant a lot of shopping. A bit exhausting. I finally gave up on finding a cover-up for walking from the hotel to our snorkeling beaches, and just decided to make one. Everything I was finding was either gaudy or non-functional, and everything was expensive, so I just went to Joann's last week, found sale items, and "splurged".

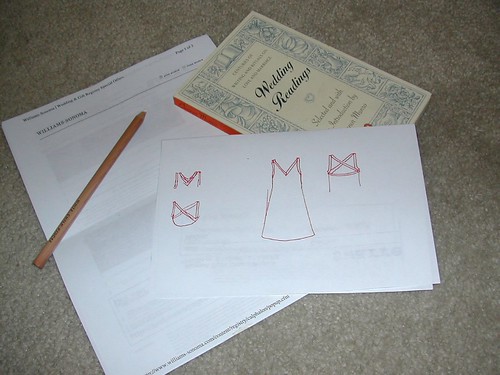
I came up with a detailed plan:


(note ubiquitous printouts of registry information and collection of readings for the service -- still need to choose two!)
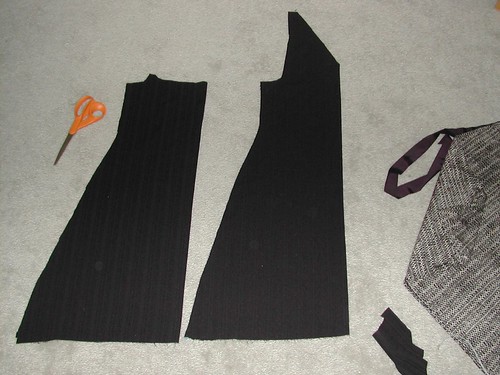
Then I used a dress and a sleeveless v-neck to approximate a good size and shape.


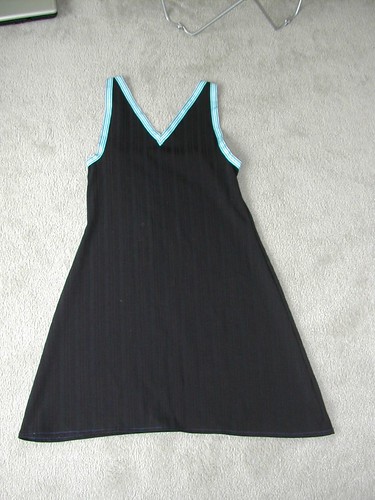
And then I hemmed the sides (My first time using a walking foot! Good fun.), sewed on the ribbon, decided that the back wasn't working and so removed the cross and replaced with strait straps, and then used a zig-zag stitch to hem the bottom. It turns out that the only black thread that I have causes my sewing machine to choke, and so the thread was orange, turquoise (from two decades ago, since the label has a Canadian flag and French on it), and navy. Good enough!


It actually fits very well. Yay! The body is perfect, and the hem is straight. The ribbon is slightly puckery, and so I'm considering adding darts to it, but it really barely even needs it, and for beach-wear, it's just fine. :-)

My favourite parts are (1) where the two ribbons join at the shoulder, and (2) the seam for the v-neck.


And this morning, I woke up feeling accomplished (for thirty seconds until I remembered the rest of the things on the list.) :-) Only three more days until we leave for Boston!

Labels: ,

A new look

April 11, 2007

Too many nights in a row of wedding things, and last night I revolted and took up a totally unrelated project. :-)

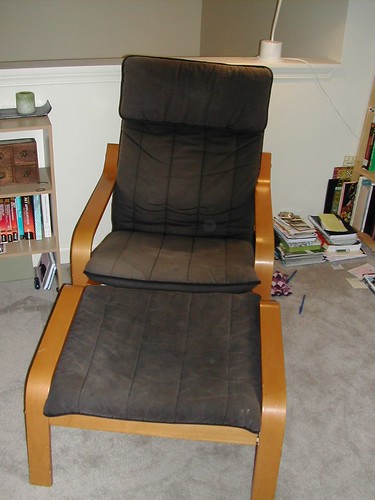
After Kevin graduated, I was hanging out at his fraternity helping him get packed up. One of his fraternity brothers was packing his car and left an Ikea chair till last. It wouldn't fit, and I offered to buy it. At $25, it felt like quite the steal, and was the first piece of furniture for my first apartment. (Thanks, Metzger!!) After four years of college abuse, and four years since of sitting in the sunshine at my place, it's been looking a bit worse for wear.


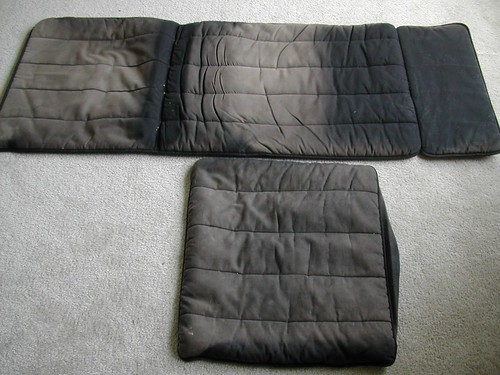
In case you can't see in that photo, the formerly black cover is now a mottled mix of pink, grey, and charcoal. The stripes at the creases are substantially darker than the surrounding fabric.


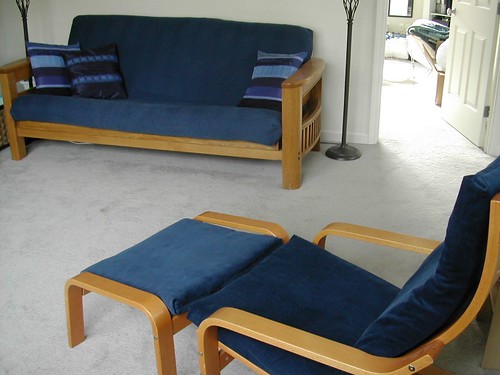
It also looked chronically out of place next to our other furniture, especially the blue futon.

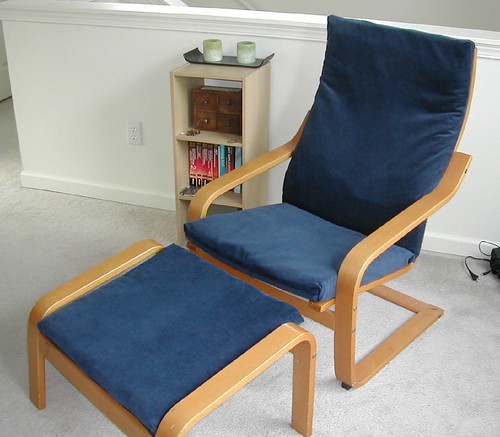
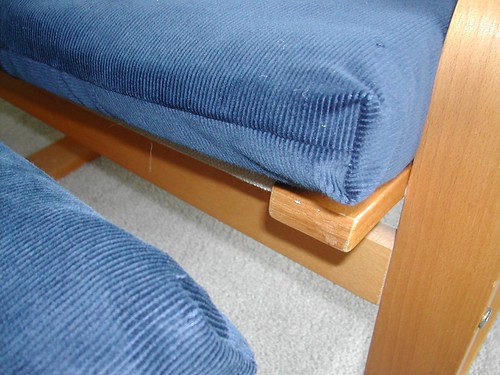
So a trip to Joann fabrics, where I found a $9 corduroy remnant, *just* big enough, that matched perfectly (what ARE the odds?!**), and a few hours later, I had a brand new chair!!


It looks so sophisticated and wonderful compared to the old one! :-) I reused all of the padding from the original, so I didn't have to go through the nonsense of cutting foam -- a major plus. Best of all, it not only coordinates with the futon, it really matches!!


The wood somehow even looks like it was meant to go! Pretty crazy cool.

I didn't use a pattern, just sort of lay the fabric down, matched things up, cut a bit and went to town with the sewing machine. I chose to have overlapping fabric in the back rather than dealing with zippers. I had to rip three seams (out of probably 25 or thirty), but that's better than my usual average. :-) The size is great, and I figured out how to square off all of the corners by refolding the fabric and seaming, which I feel particularly clever about.


Yay!


**Unfortunately, I tried to turn one lucky find into a streak. The quest for bridal shoes was a bust, and I didn't even like anything in Crate & Barrel. Should have stopped while I was ahead.

Labels:

A crafty present pouch

February 05, 2007

While I've always considered myself an unusually structure-happy person, time management in the conventional sense isn't really my thing. Master of procrastination, to put a positive spin on things. I run five minutes past fashionably late, I post in batches every two weeks, and I hate going to bed because I feel like I've squandered the evening. In some ways Kevin is the opposite. He likes getting up and being busy all Saturday morning so that he can relax in the afternoon, he likes leaving the house when he says he will, and he's probably the most efficient worker I've ever seen. On the flip side, a list of 15 things can take him an hour and a half at the grocery store, and he's more into the "season" of important days than the date itself. So perhaps it's not surprising that we didn't open each others' Christmas gifts until Febrary third...

Part of it is that we didn't celebrate at home, and we'd make a conscious decision early on to celebrate when we got back, rather than lugging, security-checking, and flying gifts to Florida and back. Then Kevin was busy at work, then we were wedding planning, then I sprained my wrist and couldn't finish cutting out the pieces of his homemade gift book, and all of a sudden, January was gone. Kevin was at work all day on Saturday, and since I was in need of a project, feeling guilty about the delay, and realized that we were straddling Christmas and Valentines day, I decided to sew him a gift pouch rather than wrapping.

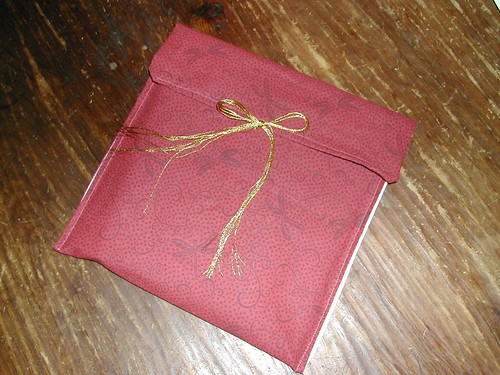
I bought this fabric a year ago -- red with fireflies and a gorgeous white and taupe speckled pattern. I used pink thread to sew it and gold embroidery floss to tie it, as a nod to the holiday-straddling.


And here it is tied up:


It took all of 10 minutes to make, including winding the bobbin and sewing in the ends. I placed the two fabrics right-side-together, and cut so that there was 3/4" on each side of the book, and so that the fabric was a little under 2.5 book-lengths long. I ironed both pieces. Then, holding them right sides together, I sewed a U down the long right side, across the bottom, and up the long left side. Cut thread, turned rightside out and pressed the edges with my fingers. I folded the top edge like wrapping paper (corners folded in as small triangles, rolled the edge around twice) and I seamed that. Then I folded the bottom edge up to make a big enough pocket for the book, and seamed both long edges. I like that you can see the white lining on the side seams. It looks so pretty and polished.

For finishing, you'll have six ends to weave in -- pull or sew the thread to the same side, knot, and sew the ends in between the layers. Fold the bag in half horizontally, and sew in ties (embroidery thread? Fine ribbon? A snap? A button and elastic?) at the crease.

Labels: